This article’ll show you how to install VestaCP on CentOS 7 in simple steps. Are you looking for a powerful and easy-to-use control panel for your CentOS 7 server? If so, VestaCP may be the perfect solution for you. VestaCP is a free and open-source control panel that allows you to manage your server and websites easily.
What is VestaCP?
Vesta Control Panel (VestaCP) is an open-source hosting control panel that can manage multiple websites, create and manage email accounts, and create and manage FTP accounts. Also, manage MySQL database and DNS records. To manage a website, we take a lot of benefits from cPanel, but if we want, we can use VestaCP for our work. Now, we will see how to install VestaCP on CentOS7.
How to install VestaCP?
If you are a Linux user, open your terminal, and if you are a Windows user, then open PuTTY from your PC.
Step 1: Update your package index
First, you need to connect to your server via SSH. Any SSH client can connect to your server, such as PuTTY or OpenSSH. Once you’re connected, make sure that your server is up to date by running the following command:
sudo yum update -y
Step 2: Download the installation script
Next, you need to download the VestaCP installation script. You can do this by running the following command:
curl -O http://vestacp.com/pub/vst-install.sh
Step 3: Install VestaCP on CentOS
Once you have downloaded the installation script, you can run it using the following command:
bash vst-install.sh
This will start the installation process. During installation, you will be prompted to enter information, such as your email address, hostname, and password. Ensure to provide accurate information, as this will be used to create your VestaCP account.

Step 4: Access your VestaCP control panel
Once the installation is complete, you can access your VestaCP on the CentOS control panel by visiting your server’s IP address in a web browser. The default port for VestaCP is 8083, so you should enter the following URL in your browser:
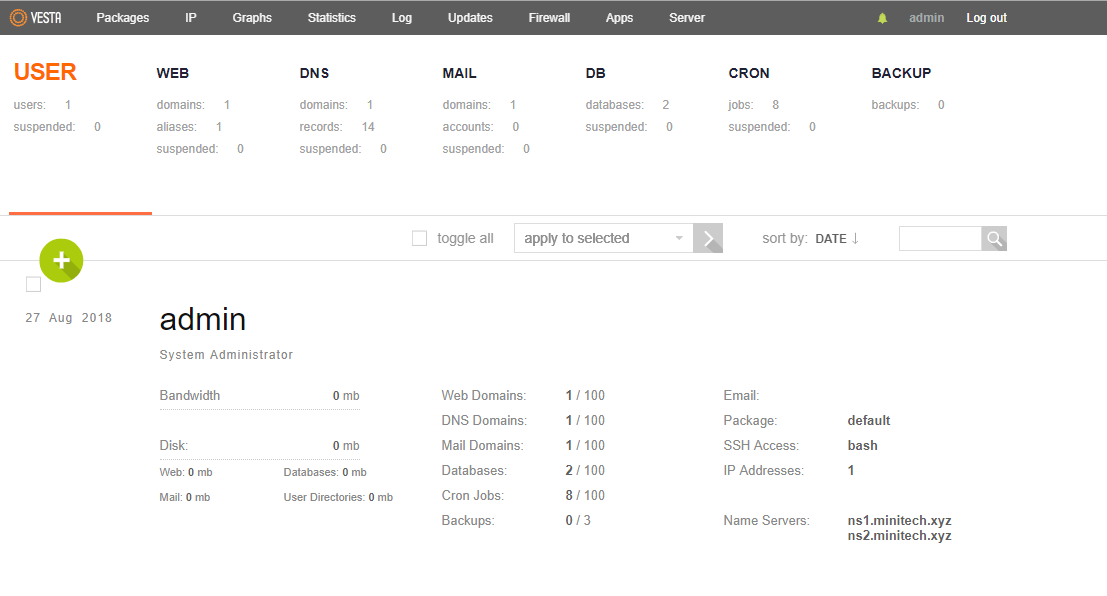
Congratulations, you have just successfully installed the Vesta Control Panel
https://your-server-ip:8083
username: admin
password: oeBY4YqTdfzp
Here are your login details. Follow the instructions from here and log in to your VestaCP.
When you go to login VestaCP for the first time, the website will look insecure, you will have to go ahead by clicking Proceed to unsafe.
https://your-server-ip:8083

When prompted, enter your VestaCP username and password to log in.

Step 5: Configure your server and websites
After installing VestaCP on CentOS and logging in, you can set up your server and websites. VestaCP offers an easy-to-use interface for managing your server, domains, email accounts, and other features. You can even enhance VestaCP by installing extra software and plugins.

If you login correctly with your login information, you will see the VestaCP dashboard as in the image below.